OpenPLC Editor for CONTROLLINO
Introduction In the world of industrial automation, having an intuitive and powerful programming environment is key. OpenPLC Editor, combined with CONTROLLINO, brings a seamless IEC
Interrupts are useful for automatically executing things in microcontroller programs and can solve timing problems. Good tasks for using an interrupt may include reading a rotary encoder or monitoring user input.
The Arduino Uno has 2 and the Mega has 6 external interrupt pins available:
On the other hand the pin change interrupts can be enabled on many more pins.
Note*
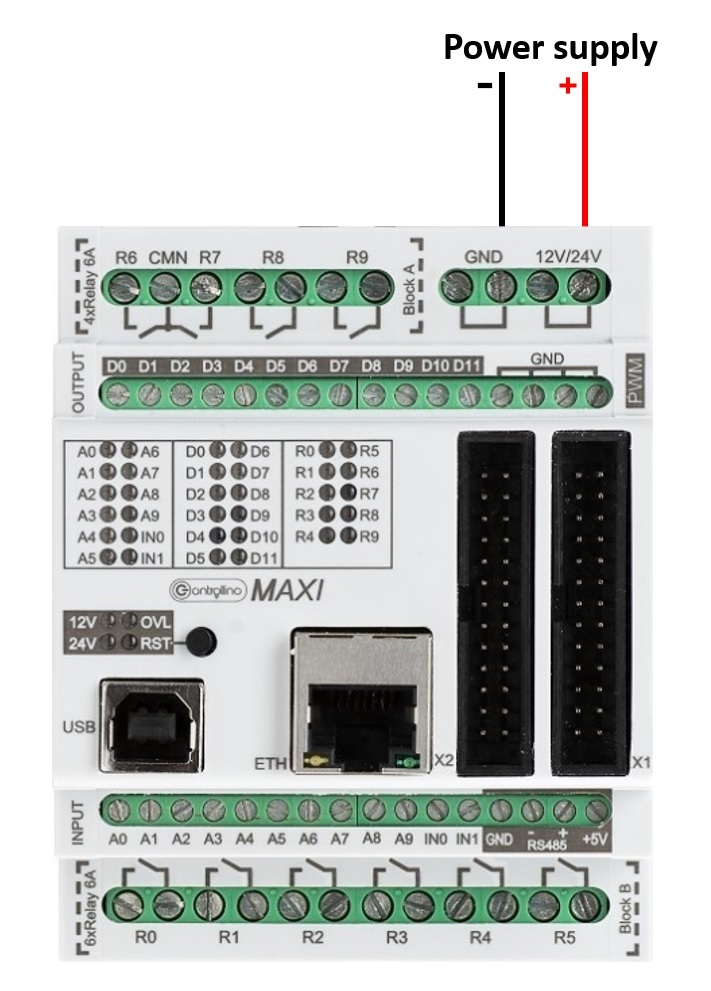
Pin header is working on 5V TTL levels. Voltage levels over 5.5V can damage the Controllino permanently.
#include <Controllino.h>

const byte digital_output = CONTROLLINO_D0;
const byte interruptPin = CONTROLLINO_IN1;
volatile byte state = LOW;

void setup() {
 pinMode(digital_output, OUTPUT);
 pinMode(interruptPin, INPUT);
 attachInterrupt(digitalPinToInterrupt(interruptPin), blink, CHANGE);
}

void loop() {
 digitalWrite(digital_output, state);
}

void blink() {
 state = !state;
}