Embbeded web to test Controllino MICRO features
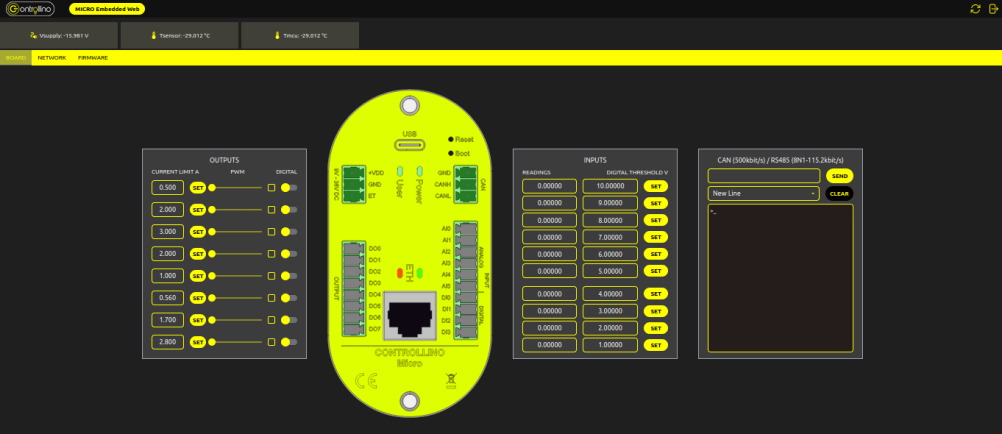
The project provides an easy to install tool to test the main features of the Controllino MICRO by serving an embedded web application directly from
The project provides an easy to install tool to test the main features of the Controllino MICRO by serving an embedded web application directly from the device, easilly accesible from any web browser.
For easy installation first it is necessary to put the device in bootloader mode, to do this:
The board will appear as a mass storage device, copy then the .uf2 file to the device, it will reboot and start the web server
The default IP address is 10.22.1.184 and the default user and password are admin and admin respectively so just open a browser and go to http://10.22.1.184/ to access the web server. Enjoy!
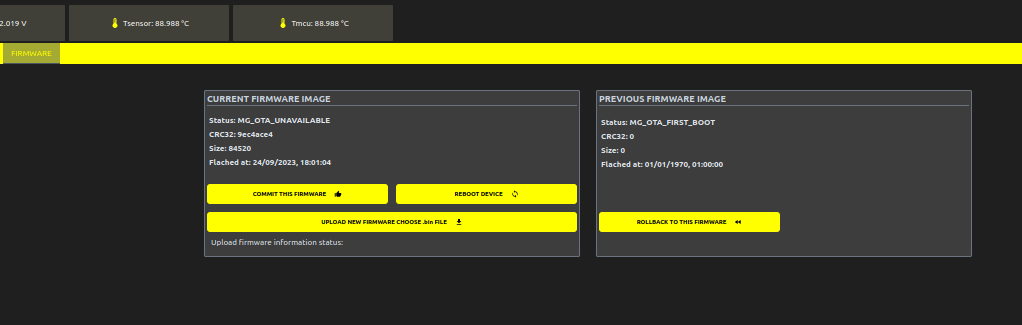
In the tap FIRMWARE UPDATE you can update the firmware using the OTA feature.
Here there are some .bin files to test the OTA feature:
Developed on react js uses also gulp to automate some parts of the build process, trying to generate the minimal weight app to embed in the microcontroller.
On PlatformIO build build_web.py script is executed to build the web app into lib/webapp/packed_fs.c source file that later is compiled with the firmware.
cd webdevnpm installnpm run dev1.Ease of Use and Installation
This project offers a simple and quick approach to testing the functionalities of the Controllino MICRO through an embedded web server accessible from any browser, eliminating the need for complex configurations or external tools.
2.Intuitive OTA Updates
The implementation of the OTA firmware update system ensures an efficient workflow for keeping the device up to date, allowing testing, rollback, and management of firmware versions in a reliable and user-friendly manner.
3.Integration of Modern Tools
Combining technologies such as PlatformIO, React, and Mongoose demonstrates a commitment to modern and efficient development, ensuring optimal performance for both the firmware and the web application.
4.Flexibility and Customization
Thanks to the modular structure of the project, developers can customize both the firmware and the web application according to their specific needs, using well-organized and documented components.
5.Contribution to the Open-Source Community
By leveraging open-source dependencies and providing clear documentation, this project fosters collaboration and learning within the community, making it accessible and extensible for other developers.
6.Solid Foundation for Future Developments
This project not only meets current needs for testing and configuring the Controllino MICRO but also lays a scalable foundation to integrate additional functionalities and extend its capabilities in the future.
7.Educational and Professional Benefits
Combining hardware and software in this project makes it a valuable tool for both enthusiasts and professionals, facilitating understanding and experimentation with modern embedded technologies.
The project provides an easy to install tool to test the main features of the Controllino MICRO by serving an embedded web application directly from
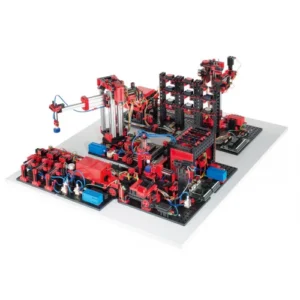
In the realm of industrial automation and digitalization, hands-on training and simulation are invaluable. Recognizing this need, our partner Fischer Technik has launched an innovative